Tagged: j2me Toggle Comment Threads | Keyboard Shortcuts

  • pit 12:16 am on October 4, 2008 Permalink | Reply
    Tags: amms, , j2me, , jsr234,   

    Nokia S60 5th edition and Java: pointerPressed() to the rescue? 

    Let’s be honest: how many of you usually implement pointer handlers when writing Java ME applications?

    It’s a matter of fact: touch-based devices are mostly Windows Mobile based, and there’s never been deep love between Microsoft smartphones and MIDlets. SonyEricsson and Motorola tried the way with some similar devices too, but without great success, cause also an audience (and a technology) not yet mature enough for the mobile touch revolution, officially started by the loved/hated (choose the one you prefer) iPhone.

    Now that Nokia finally introduces touchscreen on its top devices, things should finally start to change. Some Java ME frameworks (e.g.: TWUIK) already offer powerful touch-based interfaces (just check out their video gallery), but I’ll bet my 2 cents that we’ll see a whole lot more iPhone-style Java ME apps in the next few weeks.

    Touch apart, for those of you wondering about the long awaited and ever wanted OverlayControl and brothers from AMMS, no luck: 5th edition still lacks them all and, as S60 3rd edition FP2, only supports music and audio3d capabilities.

    Generally speaking, S60 5th edition introduced really (really!) few news for Java developers (apart from the touch interface, of course): Is this a symptom of Java maturity, or of its approaching deadline? And, above all, isn’t this question a bit old..?

     
    • tiger79 9:11 am on October 6, 2008 Permalink

      well its nice to see nokia taking over some succesfull formulas.. it’s always better to steal a good idea than create a bad one urself :D
      and i’m one of those who actually believe j2me is approaching its deadline.. too many (better) options are available or are coming (iphone/android)… if j2me was a platform/language that is evolving it would be otherwise, but we have been waiting 4 years now for midp 3.0 and still its only a draft.. guess it might come out in a year or two (maybe) but the market will be so fragmented at that point that it will be a suicide mission…
      just my 2 (pessimistic) cents ;)

  • pit 3:09 pm on September 15, 2008 Permalink | Reply
    Tags: , j2me, , menu, menu transition, sliding menu,   

    Building a J2ME sliding menu with text and images 

    Whatever you’re building, a game or an application, you always need a menu to let users navigate through sections of your MIDlet.

    This article will show how to build a menu with text and icons, and with a nice sliding effect to go from one menu item to another. You can see the final effect on the emulator page: J2ME Sliding Menu in action.

    Source code: SlideIconsMenu class

    As always, let’s start defining our class:

    public class SlideIconsMenu
    {
    }

    Now, we define some appearance-related properties, that can be customized to change menu colors and font.

    // selected item index
    public int selectedIndex = 0;
     
    // icon label color
    public int textColor = 0xff0000;
     
    // menu bg color
    public int bgColor = 0xffffff;
     
    // icon label font
    public Font textFont = Font.getDefaultFont();
     
    // menu right and left Images
    public Image slideRightImage = null;
    public Image slideLeftImage = null;

    And some other properties, that will be internally used by the menu class itself, to handle content and the sliding animation:

    // menu size
    int width = 0;
    int height = 0;
     
    // item labels
    String[] labels = null;
    // item icons
    Image[] icons = null;
     
    // previous item index (during menu translation)
    int prevIndex = 0;
     
    // menu sliding translation properties
    public int translationDuration = 500;
    long startTranslationTime = 0;

    Now, let’s define the menu constructor. We need a constructor that will accept these arguments:

    • a set of item labels
    • a set of images, one for each item
    • the menu width
    • and the menu height
    public SlideIconsMenu(String[] labels, Image[] icons, int width, int height) throws Exception
    {
    	this.width = width;
    	this.height = height;
     
    	this.labels = labels;
    	this.icons = icons;
     
    	slideRightImage = Image.createImage("/slide_right.png");
    	slideLeftImage = Image.createImage("/slide_left.png");
    }

    The constructor also creates 2 Images to represent the left and right sliding arrows, that will be used to indicate more items on the menu left/right side. So, in your code, you must adapt those image paths to match existing ones within your project.

    Now we must handle item change, by letting our menu slide with a nice transition. To do this, we’ll manage the item change with the following slideItem() method:

    public void slideItem(int delta)
    {
    	if(!isTranslating() && selectedIndex + delta >= 0 && selectedIndex + delta < labels.length)
    	{
    		prevIndex = selectedIndex;
     
    		selectedIndex += delta;
     
    		startTranslationTime = System.currentTimeMillis();
    	}
    }
    public boolean isTranslating()
    {
    	return prevIndex != selectedIndex;
    }

    And finally, since we need to paint our menu, here is its paint() method:

    public void paint(Graphics g)
    {
    	g.setColor(bgColor);
    	g.fillRect(0, 0, width, height);
     
    	g.setColor(textColor);
     
    	if(selectedIndex > 0)
    	{
    		g.drawImage(slideLeftImage, 2, height / 2, Graphics.LEFT | Graphics.VCENTER);
    	}
    	if(selectedIndex < icons.length - 1)
    	{
    		g.drawImage(slideRightImage, width - 2, height / 2, Graphics.RIGHT | Graphics.VCENTER);
    	}
    	g.drawString(labels[selectedIndex], width / 2, height - 2, Graphics.BOTTOM | Graphics.HCENTER);
     
    	g.setClip(slideLeftImage.getWidth(), 0, width - 2 * slideLeftImage.getWidth(), height);
     
    	if(selectedIndex != prevIndex)
    	{
    		int diff = (int)(System.currentTimeMillis() - startTranslationTime);
     
    		if(diff > translationDuration)
    		{
    			diff = translationDuration;
    		}
     
    		int coeff = selectedIndex > prevIndex ? 1 : - 1;
    		int currentX = width / 2 - coeff * diff * width / translationDuration;
    		int nextX = currentX + width * coeff;
     
    		g.drawImage(icons[prevIndex], currentX, height / 2, Graphics.VCENTER | Graphics.HCENTER);
     
    		g.drawImage(icons[selectedIndex], nextX, height / 2, Graphics.VCENTER | Graphics.HCENTER);
     
    		if(diff >= translationDuration)
    		{
    			prevIndex = selectedIndex;
    		}
    	}
    	else
    	{
    		g.drawImage(icons[selectedIndex], width / 2, height / 2, Graphics.VCENTER | Graphics.HCENTER);
    	}
    }

    Sample usage

    Here’s a sample Canvas that uses the SlideIconsMenu class. The main steps are:

    • the menu constructions
    • the key handling, done within the Canvas keyPressed() method
    • the menu repainting, done periodically, to allow the sliding transition to be smoothly drawn
    import javax.microedition.lcdui.Canvas;
    import javax.microedition.lcdui.Graphics;
    import javax.microedition.lcdui.Image;
     
    public class SlideIconsCanvas extends Canvas implements Runnable
    {
    	SlideIconsMenu menu = null;
     
    	public SlideIconsCanvas()
    	{
    		Image[] im = new Image[3]; 
     
    		try
    		{
    			im[0] = Image.createImage("/item0.png");
    			im[1] = Image.createImage("/item1.png");
    			im[2] = Image.createImage("/item2.png");
     
    			menu = new SlideIconsMenu(
    				new String[]{"Item 1", "Item 2", "Item 3"},
    				im,
    				getWidth(),
    				getHeight()
    			);
     
    			new Thread(this).start();
    		}
    		catch(Exception e)
    		{
    			e.printStackTrace();
    		}
    	}
    	protected void paint(Graphics g)
    	{
    		menu.paint(g);
    	}
    	public void keyPressed(int key)
    	{
    		int gameKey = getGameAction(key);
     
    		if(gameKey == Canvas.RIGHT)
    		{
    			menu.slideItem(1);
    		}
    		else if(gameKey == Canvas.LEFT)
    		{
    			menu.slideItem(- 1);
    		}
    	}
    	public void run()
    	{
    		try
    		{
    			while(true)
    			{
    				repaint();
     
    				synchronized(this)
    				{
    					wait(100L);
    				}
    			}
    		}
    		catch(Exception e)
    		{
    			e.printStackTrace();
    		}
    	}
     
    }

    Download source code

    You can download full source code here:

     
    • deanet 7:21 pm on September 24, 2008 Permalink

      wew … nice code :mrgreen:

    • Stella 8:26 am on October 1, 2008 Permalink

      Hi ,
      this screen is brilliant, i was wondering if you could come up with a design that is similar to the carousel interface of yahoo GO!. this design is quite close to that

      byeeeee ;)
      Stella

    • pit 9:04 am on October 1, 2008 Permalink

      Thanks for your feedback :)

      @stella: check out this other article, if it could suit your needs
      http://www.jappit.com/blog/2008/04/24/building-a-fisheye-menu-in-j2me-with-jsr-226/

    • Stella 7:04 am on October 15, 2008 Permalink

      yep i seen that. but that uses JSR226 right :( what about devices that dont have JSR266

      Regards
      Stella

    • Tyler 1:22 pm on April 30, 2009 Permalink

      Hi jappit;
      i have look at your code but i think you always refresh screen and wait 100ms. right? It uses 100% processor.

    • jermaine 3:23 am on September 29, 2010 Permalink

      thanks for this bit of code…but uhm, how do i run this? i copied the source codes but i dont know where to place the jar files…

  • pit 8:44 am on September 12, 2008 Permalink | Reply
    Tags: , , j2me, , list, ,   

    How to build a Canvas based List in J2ME 

    Quite a bit of time is passed since the last Java ME tutorial.. so It’s time for something new, don’t you think?

    Today we’ll see how it is possible to implement a simple Canvas based List, with the following features:

    • customizable style (colors, margins, font)
    • vertical scrolling
    • image and text support (as for standard Java ME Lists)

    Java ME Canvas based List screenshot

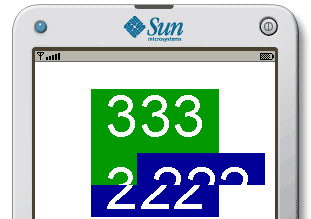
    It is possible to see this code in action on the emulator page.

    Writing the code

    First thing you should define some style-related properties, that will be used to paint the List items. Name of single properties is self-explaining.

    int linePadding = 2;
    int margin = 2;
    int padding = 2;
    Font font = Font.getDefaultFont();
     
    int bgColor = 0xffffff;
     
    int foreColor = 0x000000;
    int foreSelectedColor = 0xffffff;
    int backColor = 0xffffff;
    int backSelectedColor = 0x0000ff;
     
    int borderWidth = 3;
    int borderColor = 0x000000;
    int borderSelectedColor = 0xff0000;

    Now, here are some internal properties, that will be used to handle list items content and positioning.

    // will contain item splitted lines
    String[][] itemLines = null;
    // will hold items image parts
    Image[] images = null;
    // will hold selected item index
    public int selectedItem = 0;
     
    // these will hold item graphical properties
    int[] itemsTop = null;
    int[] itemsHeight = null;
     
    // these will hold List vertical scrolling
    int scrollTop = 0;
    final int SCROLL_STEP = 40;

    Now, here is the CanvasList constructor. Its arguments are (similarly to javax.microedition.lcdui.List constructor):

    • the screen’s title
    • set of strings specifying the string parts of the List elements
    • set of images specifying the image parts of the List elements

    This article will not cover the handling of different types of Lists (e.g.: exclusive, multiple, ..).

    public CanvasList(String title, String[] items, Image[] imageElements)
    {
    	setTitle(title);
     
    	this.images = imageElements;
     
    	itemLines = new String[items.length][];
     
    	itemsTop = new int[itemLines.length];
    	itemsHeight = new int[itemLines.length];
     
    	for(int i = 0; i < itemLines.length; i++)
    	{
    		// get image part of this item, if available
    		Image imagePart = getImage(i);
     
    		// get avaiable width for text
    		int w = getItemWidth() - (imagePart != null ? imagePart.getWidth() + padding : 0);
     
    		// and split item text into text rows, to fit available width
    		itemLines[i] = getTextRows((String) items[i], font, w);
    	}
    }

    Here are the 2 utility methods found in the CanvasList constructor:

    public int getItemWidth()
    {
    	return getWidth() - 2 * borderWidth - 2 * padding - 2 * margin;
    }
    Image getImage(int index)
    {
    	return images != null && images.length > index ? images[index] : null;
    }

    Now, here is the paint() method:

    protected void paint(Graphics g)
    {
    	// paint List background
    	g.setColor(bgColor);
    	g.fillRect(0, 0, getWidth(), getHeight());
     
    	// translate accordingly to current List vertical scroll
    	g.translate(0, - scrollTop);
     
    	int top = 0;
     
    	g.setFont(font);
     
    	// loop List items
    	for(int i = 0; i < itemLines.length; i++)
    	{
    		int itemRows = itemLines[i].length;
     
    		Image imagePart = getImage(i);
     
    		int itemHeight = itemRows * font.getHeight() + linePadding * (itemRows - 1);
     
    		itemsTop[i] = top;
    		itemsHeight[i] = itemHeight;
     
    		// is image part higher than the text part?
    		if(imagePart != null && imagePart.getHeight() > itemHeight)
    		{
    			itemHeight = imagePart.getHeight();
    		}
    		itemHeight += 2 * padding + 2 * borderWidth;
     
    		g.translate(0, top);
     
    		if(borderWidth > 0)
    		{
    			// paint item border
    			g.setColor(i == selectedItem ? borderSelectedColor : borderColor);
    			g.fillRect(margin, margin, getWidth() - 2 * margin, itemHeight);
    		}
     
    		// paint item background
    		g.setColor(i == selectedItem ? backSelectedColor : backColor);
    		g.fillRect(margin + borderWidth, margin + borderWidth, getWidth() - 2 * margin - 2 * borderWidth, itemHeight - 2 * borderWidth);
     
    		// has this item an image part?
    		if(imagePart != null)
    		{
    			g.drawImage(imagePart, margin + borderWidth + padding, margin + borderWidth + padding, Graphics.TOP | Graphics.LEFT);
    		}
     
    		// paint item text rows
    		g.setColor(i == selectedItem ? foreSelectedColor : foreColor);
     
    		int textLeft = margin + borderWidth + padding + (imagePart != null ? imagePart.getWidth() + padding : 0);
     
    		for(int j = 0; j < itemRows; j++)
    		{
    			g.drawString(itemLines[i][j], textLeft, margin + borderWidth + padding + j * (linePadding + font.getHeight()), Graphics.TOP | Graphics.LEFT);
    		}
     
    		g.translate(0, - top);
     
    		top += itemHeight + 2 * margin;
    	}
    	// finally, translate back
    	g.translate(0, scrollTop);
    }

    And finally, to handle user key events, here is the keyPressed() event:

    protected void keyPressed(int key)
    {
    	int keyCode = getGameAction(key);
     
    	// is there 1 item at least?
    	if(itemLines.length > 0)
    	{
    		// going up
    		if(keyCode == Canvas.UP)
    		{
    			// current item is clipped on top, so can scroll up
    			if(itemsTop[selectedItem] < scrollTop)
    			{
    				scrollTop -= SCROLL_STEP;
     
    				repaint();
    			}
    			// is there a previous item?
    			else if(selectedItem > 0)
    			{
    				selectedItem--;
     
    				repaint();
    			}
    		}
    		//going down
    		else if(keyCode == Canvas.DOWN)
    		{
    			// current item is clipped on bottom, so can scroll down
    			if(itemsTop[selectedItem] + itemsHeight[selectedItem] >= scrollTop + getHeight())
    			{
    				scrollTop += SCROLL_STEP;
     
    				repaint();
    			}
    			// is there a following item?
    			else if(selectedItem < itemLines.length - 1)
    			{
    				selectedItem++;
     
    				repaint();
    			}
    		}
    	}
    }

    About the getTextRows() method, you can grab an implementation (but you could find a lot of other ones on the Web) on this other article written some time ago: J2ME Scrollable Text.

    How to use CanvasList class

    Here is a sample usage of CanvasList class, that will display a list (without image parts):

    String[] items = new String[]{"Item 1", "Item 2", "Item 3"};
     
    CanvasList myCanvas = new CanvasList("Test canvas", items, null);

    To add images to your items, it’s necessary to instantiate an Image array, and pass it to CanvasList constructor as its third argument:

    Image[] images = null;
    try
    {
    	images = new Image[]{
    		Image.createImage("/item1.png"),
    		Image.createImage("/item2.png"),
    		Image.createImage("/item3.png")
    	};
    }
    catch(Exception e)
    {
    	e.printStackTrace();
    }
    String[] items = new String[]{"Item 1", "Item 2", "Item 3"};
     
    CanvasList myCanvas = new CanvasList("Test canvas", items, images);

    Related resources

    You can download full CanvasList source code here: CanvasList.java

     
    • cool8jay 9:19 am on June 24, 2010 Permalink

      Very good tutorial about scrollable list view, it meets my demand. But the getTextRows() method has some shortcoming: it does not support language not using space as delimiter, like Chinese and Japanese.

      Here is a more flexible version:
      http://dev.firnow.com/course/3_program/java/javajs/20090304/157622.html#comment

    • ketut joko 2:04 pm on July 7, 2011 Permalink

      when i add this file class my main class cant detect, can u explain it please?

    • pooja 12:48 pm on January 16, 2013 Permalink

      Thanks. Nice post.

      But I am phasing the problem in converting the same for touch. As we need to give touch scrolling on the list. This post is for keypress events. can you please provide the same with touch scrolling.

  • pit 3:44 pm on July 18, 2008 Permalink | Reply
    Tags: blog uploader, , , j2me, , , mobile blog, , mtv community, ,   

    Mobile Mtv Blog Uploader: yet another FlashLite and J2ME apps! 

    As told some days ago, MtvMobile launched 2 phones with its initial offer as virtual mobile operator. And, for these 2 phones (a Nokia 5320 and a SE W760), 2 cool applications were lauched. I’ve already talked about Mtv OnDemand, a FlashLite and Java ME streaming video player that allows users to view selected MTV videos, and download related content (like ringtones and wallpapers).

    Now it’s time to view the other one: it’s called Mtv.it Blog, and it’s a simple and effective mobile blog uploader.

    Mtv.it blog Uploader screenshots

    Using this app, users are able to upload contents (photos, videos, audio or simple text) from their mobile phone directly on their Mtv blog. As for Mtv OnDemand, there are both a Java ME and a Flash Lite version of this app, quite identical in both their interface and functionalities.

    As for the other one, I’ll post complete videos of this app as soon as I have it working again :)

     
    • Leonardo 8:12 pm on July 20, 2008 Permalink

      Ciao Alessandro!

      seems a really cool app! Congrats ;)

      Leonardo

    • pit 10:09 am on July 21, 2008 Permalink

      Ciao Leonardo!

      thanks for your comment :)

      Pit

    • Li Yong Fei 1:54 pm on July 21, 2008 Permalink

      Hi, Pit

      Your blog looks very greate, I have added your blog in my “flash Lite Blog”, hope more flash lite developer can visit your blog, and give us more experience, Thanks for your share!.

      Li Yong fei

    • pit 2:03 pm on July 21, 2008 Permalink

      Hi Li Yong Fei,

      thanks for your feedback! I’m really glad of being featured on your great blog :)

      Pit

      PS: I’ve updated my blogroll too ;)

    • Satya 1:11 pm on October 1, 2008 Permalink

      Really good article. I have been following your blog for last 3 months. You have good knowledge
      on Mobile(cell phone) Industry and happenings. Please continue the good work. Thank you.

    • pit 1:15 pm on October 1, 2008 Permalink

      Thanks for your feedback Satya!

      I’ve been less active on this blog in this last weeks, due to a lot of work to do :( anyway, I’m already working on some new tutorials, so expect to see new code really soon!

  • pit 1:15 pm on July 15, 2008 Permalink | Reply
    Tags: , , j2me, , , , , streaming video, virtual operator   

    Mtv On Demand: new FlashLite and Java ME apps released! 

    Last friday (July 11th) was a big mobile day here in Italy: apart from the worldwide release of iPhone 3G (sold in Italy at something like 3 times the USA price…), MTV became virtual mobile operator!

    MTV Mobile logo

    For its initial launch (you can see some photos of the launch event on Flickr) MTV released 2 phones: a Nokia 5320 Xpress Music and a Sony Ericsson W760, both heavily customized with special covers and themes.

    But, what really interests to us, is the launch of 2 embedded applications on these phones :)

    The first one is called Mtv On Demand, and it’s a streaming video player that allows to view selected videos from MTV programs. The interface is pretty slick, and allows users to navigate video galleries using LEFT/RIGHT keys, while with UP/DOWN they’ll scroll videos within a single category.

    MtvOnDemand screenshots

    Interesing thing is that this app was built on each phone using different technologies: FlashLite for Nokia 5320 and Java ME for SE W760, so, reproducing the same look&feel and functionalities with 2 traditionally so-different technologies.

    Since I currently have not an MTV SIM and phone, I cannot make a video of the app itself, but I’ll post it (and also post about the 2nd application ;) ) asap!

     
    • Alessandro 5:37 pm on July 20, 2008 Permalink

      Ciao Alessandro,

      looks like a great application, would love to try it!!
      Alessandro

    • pit 10:12 am on July 21, 2008 Permalink

      Ciao Alessandro!

      Thanks for your feedback!

      Would be great to let you try them, but both the apps currently work only with the 2 MTV phones (and related SIMs).. my test SIM was cut off too, and I’m not able to test them anymore… :-(

      Pit

    • Li Yong Fei 1:46 pm on July 21, 2008 Permalink

      Very cool application,!

    • Jukka 4:20 pm on July 22, 2008 Permalink

      Hi Pit,
      great apps! Shows very good the possibilities of Flash Lite.
      Big thanks for promoting us :)

  • pit 3:46 pm on May 22, 2008 Permalink | Reply
    Tags: image effect, j2me, sliding,   

    J2ME Image effects part 2: sliding transitions 

    After an explosive J2ME class, now it’s the time for sliding transition effects. With the following SlidingImage class you’ll be able to seamlessly add both SlideIn and SlideOut effects to your toooo static apps!

    J2ME sliding transition effect screenshot

    As usual, take a look at how this would appear in a real phone, and then proceed with the simple these 1,2,3 steps :)

    1. Download and include in your code the SlidingImage.java class
    2. Instantiate a new SlidingImage:
      SlidingImage image = new SlidingImage(
      	Image.createImage("/image1.png"),
      	10,
      	SlidingImage.SLIDE_OUT);

      These are the constructor arguments:

      • An Image object to be slided
      • The number of pieces of the sliding image
      • The type of slide, can be SlidingImage.SLIDE_IN or SlidingImage.SLIDE_OUT
    3. Start the sliding effect, specifying its direction and duration (in milliseconds):
      image.slide(Canvas.RIGHT, 3000);

      Direction can be one of Canvas properties UP, RIGHT, DOWN and LEFT.

    4. Now you can paint it simply specifying coordinates and an anchor, as usual:
      image.paint(g,
      	100, 100,
      	Graphics.HCENTER | Graphics.VCENTER);
    5. If you remember ExplodingImage class, you can check if effect is ended with the public ended property:
      if(image.ended)
      {
      //effect-end related code
      }
    6. If you want to reset the effect, also changing the sliding image pieces and effect type (slide in or out), you can use the reset() method:
      //to reset changing also slides and type properties
      image.reset(12, SlidingImage.SLIDE_IN);
      //otherwise, to simply reset:
      image.reset();

    You can download source code here:

     
    • Absar 9:14 am on February 10, 2009 Permalink

      nice

    • rohit 11:32 am on September 23, 2010 Permalink

      really nice article.. good work!!

c
compose new post
j
next post/next comment
k
previous post/previous comment
r
reply
e
edit
o
show/hide comments
t
go to top
l
go to login
h
show/hide help
shift + esc
cancel