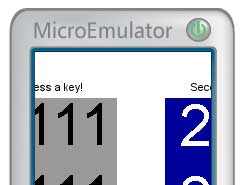
Today we’ll see a simple way to add sliding transition between Canvas in a Java ME application. Just take a look at it in the emulator page to see how it performs: Canvas sliding transitions in action!
The source code
FxBaseCanvas
First of all, we know that Canvas paint() method is protected, so, to access it from the class we’ll build, we must extend its visibility by extending Canvas class itself. We’ll do it by defining our FxBaseClass in this simple way:
import javax.microedition.lcdui.Canvas;
import javax.microedition.lcdui.Graphics;
import javax.microedition.lcdui.Canvas;
import javax.microedition.lcdui.Graphics;

public class FxBaseCanvas extends Canvas
{
	public void paint(Graphics g)
	{
	}
} |
CanvasSlideFx
Now, we start building our CanvasSlideFx class, that will extend Canvas itself. We start defining some useful properties:
// time related properties
long startTime = 0;
long duration = 0;

// current state of the transition
boolean running = false;

// direction of sliding
int direction = LEFT;

// the previous and next Canvas instances
FxBaseCanvas fromCanvas = null;
FxBaseCanvas toCanvas = null;

// the current Display object
Display display = null;

// properties used to correctly place the 2 Canvas
int deltaX = 0;
int deltaY = 0; |
Now, we define our class constructor, that will initialize coordinate properties according to the specified transition direction. The detailed argument list is:
- The current Display object, that will be used to retrieve the current displayed Canvas, and to set the next one
- The destination Canvas, that will extend the previously defined FxBaseCanvas class
- The transition direction (one of Canvas.UP, RIGHT, DOWN or LEFT)
- The transition duration, in milliseconds
public CanvasSlideFx(Display display, FxBaseCanvas toCanvas, int direction, long duration)
{
	this.display = display;
	this.fromCanvas = (FxBaseCanvas)display.getCurrent();
	this.toCanvas = toCanvas;
	this.direction = direction;
	this.duration = duration;

	switch(direction)
	{
	case UP:
		deltaY = - getHeight(); break;
	case RIGHT:
		deltaX = getWidth(); break;
	case DOWN:
		deltaY = getHeight(); break;
	case LEFT:
		deltaX = - getWidth(); break;
	}
} |
Now, we define a startTransition() method, that will actually start the animation. To implement the animation itself, we let our class implement Runnable.
void startTransition()
{
	this.startTime = System.currentTimeMillis();

	running = true;

	new Thread(this).start();
} |
And here’s the run() method implementation, that we must implement from Runnable interface. As long as the animation is running, we will repaint our animated Canvas, with a given interval of 50 milliseconds (but you can freely change this). When it finishes (so, running is false), we will exit the main loop and set the current Displayable to our toCanvas.
public void run()
{
	try
	{
		while(running)
		{
			repaint();

			synchronized(this)
			{
				wait(50L);
			}
		}
	}
	catch(Exception e)
	{
		e.printStackTrace();
	}
	display.setCurrent(toCanvas);
} |
Finally, we have our paint() method, that will actually paint our transition. It will do this by painting both the source and the destination Canvas, translating them according to the transition direction, and to the elapsed time.
protected void paint(Graphics g)
{
	if(!running)
		startTransition();

	long diff = System.currentTimeMillis() - startTime;

	if(diff >= duration)
	{
		running = false;

		diff = duration;
	}

	int perc = (int)(100 * diff / duration);

	int dx = deltaX * perc / 100;
	int dy = deltaY * perc / 100;

	g.translate(dx, dy);

	fromCanvas.paint(g);

	g.translate(- deltaX, - deltaY);

	toCanvas.paint(g);

	g.translate(deltaX - dx, deltaY - dy);
} |
How to use it?
Now we’ll see how to integrate the CanvasSlideFx within an existing code that already uses Canvas.
So, let’s assume that our application currently has, somewhere in its code, these lines:
MyCanvas firstCanvas = new MyCanvas();

Display.getDisplay(myMidlet).setCurrent(firstCanvas);
...
//and somewhere else
MyOtherCanvas secondCanvas = new MyOtherCanvas();

Display.getDisplay(myMidlet).setCurrent(secondCanvas); |
where MyCanvas and MyOtherCanvas will likely extend Canvas.
Now here are the required steps to integrate transitions in our code:
- First of all, we must make MyCanvas and MyOtherCanvas extend FxBaseCanvas instead of directly Canvas. So, we’ll have:
public class MyCanvas extend FxBaseCanvas ... |
- Then, let’s say we want to animate the transition between firstCanvas and secondCanvas, we will remove the code:
Display.getDisplay(myMidlet).setCurrent(secondCanvas); |
and replace it with:
CanvasSlideFx fxCanvas = new CanvasSlideFx(
	Display.getDisplay(myMidlet),
	secondCanvas,
	Canvas.LEFT,
	500L
);

Display.getDisplay(myMidlet).setCurrent(fxCanvas); |
- and we’ve done it!

Resources and download
You can download the code explained in this article with the following links:


Ciao Alessandro,
looks like a great application, would love to try it!!
Alessandro