Tagged: fx Toggle Comment Threads | Keyboard Shortcuts

  • pit 12:23 pm on October 13, 2008 Permalink | Reply
    Tags: , fx, image library, imagefx, , ,   

    ImageFx: first commercial application is out! 

    ImageFx is a Java ME library that allows you to easily add animated transitions between different Images.

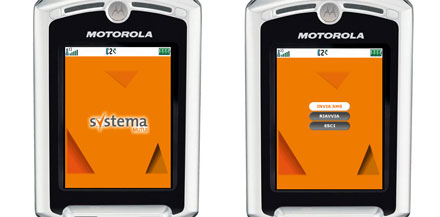
    And today Systema Mutui, the first commercial applications that makes use of it, has finally been launched :)

    The application itself is a simple animation that promotes bank services and allows users to share the animation itself with a friend. Obviously, ImageFx transitions were used to make the whole animation nicer :)

    To get further details about ImageFx API features, you can access its full JavaDocs here: ImageFx JavaDocs. For any other infos, feel free to contact me!

     
  • pit 1:39 pm on June 23, 2008 Permalink | Reply
    Tags: , fx, , sliding animations,   

    How to add sliding transitions between Canvas in J2ME 

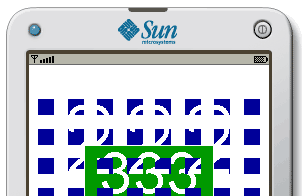
    Today we’ll see a simple way to add sliding transition between Canvas in a Java ME application. Just take a look at it in the emulator page to see how it performs: Canvas sliding transitions in action!
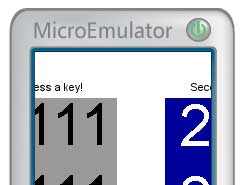
    j2me canvas sliding transition screenshot

    The source code

    FxBaseCanvas

    First of all, we know that Canvas paint() method is protected, so, to access it from the class we’ll build, we must extend its visibility by extending Canvas class itself. We’ll do it by defining our FxBaseClass in this simple way:

    import javax.microedition.lcdui.Canvas;
    import javax.microedition.lcdui.Graphics;
    import javax.microedition.lcdui.Canvas;
    import javax.microedition.lcdui.Graphics;
     
    public class FxBaseCanvas extends Canvas
    {
    	public void paint(Graphics g)
    	{
    	}
    }

    CanvasSlideFx

    Now, we start building our CanvasSlideFx class, that will extend Canvas itself. We start defining some useful properties:

    // time related properties
    long startTime = 0;
    long duration = 0;
     
    // current state of the transition
    boolean running = false;
     
    // direction of sliding
    int direction = LEFT;
     
    // the previous and next Canvas instances
    FxBaseCanvas fromCanvas = null;
    FxBaseCanvas toCanvas = null;
     
    // the current Display object
    Display display = null;
     
    // properties used to correctly place the 2 Canvas
    int deltaX = 0;
    int deltaY = 0;

    Now, we define our class constructor, that will initialize coordinate properties according to the specified transition direction. The detailed argument list is:

    • The current Display object, that will be used to retrieve the current displayed Canvas, and to set the next one
    • The destination Canvas, that will extend the previously defined FxBaseCanvas class
    • The transition direction (one of Canvas.UP, RIGHT, DOWN or LEFT)
    • The transition duration, in milliseconds
    public CanvasSlideFx(Display display, FxBaseCanvas toCanvas, int direction, long duration)
    {
    	this.display = display;
    	this.fromCanvas = (FxBaseCanvas)display.getCurrent();
    	this.toCanvas = toCanvas;
    	this.direction = direction;
    	this.duration = duration;
     
    	switch(direction)
    	{
    	case UP:
    		deltaY = - getHeight(); break;
    	case RIGHT:
    		deltaX = getWidth(); break;
    	case DOWN:
    		deltaY = getHeight(); break;
    	case LEFT:
    		deltaX = - getWidth(); break;
    	}
    }

    Now, we define a startTransition() method, that will actually start the animation. To implement the animation itself, we let our class implement Runnable.

    void startTransition()
    {
    	this.startTime = System.currentTimeMillis();
     
    	running = true;
     
    	new Thread(this).start();
    }

    And here’s the run() method implementation, that we must implement from Runnable interface. As long as the animation is running, we will repaint our animated Canvas, with a given interval of 50 milliseconds (but you can freely change this). When it finishes (so, running is false), we will exit the main loop and set the current Displayable to our toCanvas.

    public void run()
    {
    	try
    	{
    		while(running)
    		{
    			repaint();
     
    			synchronized(this)
    			{
    				wait(50L);
    			}
    		}
    	}
    	catch(Exception e)
    	{
    		e.printStackTrace();
    	}
    	display.setCurrent(toCanvas);
    }

    Finally, we have our paint() method, that will actually paint our transition. It will do this by painting both the source and the destination Canvas, translating them according to the transition direction, and to the elapsed time.

    protected void paint(Graphics g)
    {
    	if(!running)
    		startTransition();
     
    	long diff = System.currentTimeMillis() - startTime;
     
    	if(diff >= duration)
    	{
    		running = false;
     
    		diff = duration;
    	}
     
    	int perc = (int)(100 * diff / duration);
     
    	int dx = deltaX * perc / 100;
    	int dy = deltaY * perc / 100;
     
    	g.translate(dx, dy);
     
    	fromCanvas.paint(g);
     
    	g.translate(- deltaX, - deltaY);
     
    	toCanvas.paint(g);
     
    	g.translate(deltaX - dx, deltaY - dy);
    }

    How to use it?

    Now we’ll see how to integrate the CanvasSlideFx within an existing code that already uses Canvas.
    So, let’s assume that our application currently has, somewhere in its code, these lines:

    MyCanvas firstCanvas = new MyCanvas();
     
    Display.getDisplay(myMidlet).setCurrent(firstCanvas);
    ...
    //and somewhere else
    MyOtherCanvas secondCanvas = new MyOtherCanvas();
     
    Display.getDisplay(myMidlet).setCurrent(secondCanvas);

    where MyCanvas and MyOtherCanvas will likely extend Canvas.

    Now here are the required steps to integrate transitions in our code:

    1. First of all, we must make MyCanvas and MyOtherCanvas extend FxBaseCanvas instead of directly Canvas. So, we’ll have:
      public class MyCanvas extend FxBaseCanvas ...
    2. Then, let’s say we want to animate the transition between firstCanvas and secondCanvas, we will remove the code:
      Display.getDisplay(myMidlet).setCurrent(secondCanvas);

      and replace it with:

      CanvasSlideFx fxCanvas = new CanvasSlideFx(
      	Display.getDisplay(myMidlet),
      	secondCanvas,
      	Canvas.LEFT,
      	500L
      );
       
      Display.getDisplay(myMidlet).setCurrent(fxCanvas);
    3. and we’ve done it! :)

    Resources and download

    You can download the code explained in this article with the following links:

     
  • pit 12:40 pm on June 18, 2008 Permalink | Reply
    Tags: colors, , fading, , fx, text,   

    How to create a color fading text in J2ME 

    It’s time for new effects! :)

    Today we’ll see how to implement and and use text that changes multiple colors with a fading effect. You can see it in action here: J2ME text color fade effect in action.

    Color Fading Text screenshot

    So, let’s start defining our ColorFadeText class.

    The code

    We start defining the necessary properties:

    //will hold the colors to fade
    int[] colors = null;
     
    //duration of a single fade
    int fadeDuration = 0;
     
    //effect start time
    long startTime = 0;
     
    //property used to check if effect has started
    public boolean started = false;
     
    //the text to be drawn
    String text = null;

    Now, we define the main constructor, that will accept the following arguments:

    • the text to be drawn
    • an int[] array containing the colors to fade into
    • the duration of a single fade
    public ColorFadeText(String text, int[] colors, int fadeDuration)
    {
    	if(colors.length == 0)
    	{
    		throw new IllegalArgumentException("You must define at least 1 color");
    	}
    	this.text = text;
    	this.colors = colors;
    	this.fadeDuration = fadeDuration;
    }

    The effect start() method will simply set the startTime value to current time and the started property to true

    public void start()
    {
    	startTime = System.currentTimeMillis();
     
    	started = true;
    }

    Then, we have the paint() method, that will be used to paint the text on the given Graphics instance:

    public void paint(Graphics g, int x, int y, int anchor)
    {
    	if(started)
    	{
    		long diff = System.currentTimeMillis() - startTime;
     
    		int module = (int)(diff % fadeDuration);
     
    		int colorIndex = (int)(diff / fadeDuration) % colors.length;
     
    		int midColor = midColor(
    			colors[(colorIndex + 1) % colors.length],
    			colors[colorIndex],
    			module,
    			fadeDuration
    		);
     
    		g.setColor(midColor);
    	}
    	else
    	{
    		g.setColor(colors[0]);
    	}
     
    	g.drawString(text, x, y, anchor);
    }

    The following utility method will be the one actually used to get the current text color:

    static int midColor(int color1, int color2, int prop, int max)
    {
    	int red =
    		(((color1 >> 16) & 0xff) * prop +
    		((color2 >> 16) & 0xff) * (max - prop)) / max;
     
    	int green =
    		(((color1 >> 8) & 0xff) * prop +
    		((color2 >> 8) & 0xff) * (max - prop)) / max;
     
    	int blue =
    		(((color1 >> 0) & 0xff) * prop +
    		((color2 >> 0) & 0xff) * (max - prop)) / max;
     
    	int color = red << 16 | green << 8 | blue;
     
    	return color;
    }

    How to use it?

    Using the ColorFadeText object is quite simple, since it’ll be very similar to use a common String. Just follow this plain steps.

    1. Create a ColorFadeText instance

    ColorFadeText text = new ColorFadeText(
    	"I'M A FADING TEXT!",
    	new int[]{0xff0000, 0x00ff00, 0x0000ff, 0xff00ff},
    	1000
    );

    2. Start it…

    text.start();

    3. And then, in your Canvas paint() method, paint it, using the same arguments used by Graphics drawString() method (adding a reference to the Graphics instance of course):

    text.paint(g,
    	getWidth() / 2,
    	2,
    	Graphics.HCENTER | Graphics.TOP
    );

    Just a side note: since it’s an animated effect, you’ll need to repaint it quite frequently, so, for example, you can use a Thread to periodically call Canvas repaint() method.

    Source code download

    You can download source code of ColorFadeText, and of a sample Canvas that makes use of it:

    This article is also available on Forum Nokia Wiki: How to create a color fading text in Java ME.

     
  • pit 10:26 am on May 20, 2008 Permalink | Reply
    Tags: effect, explode, fx, , , ,   

    Let your images explode in J2ME! 

    After a MIDP 1.0 utility to rotate images now time has come for some image fun :)

    J2ME Image explode effect screenshot
    When writing mobile applications, it’s always cool to add some effects or transitions. But, while for example FlashLite has a nice builtin support for them, with J2ME you have to hand-code even the simplest movement (and this is the main reason why most J2ME apps are all but attractive).

    So, here’s a first class that you can use to add an “explode” effect to images in a straightforward way. How to do it? Here we come:

    1. Download the ExplodingImage.java source code and put it straight in your project
    2. Instantiate an ExplodingImage this way:
      //get your Image
      Image sourceImage = Image.createImage("/image.png");
      //and then use it in ExplodingImage constructor
      ExplodingImage image = new ExplodingImage(sourceImage , 5, 8, 8);

      The ExplodingImage constructor accepts the following arguments:

      • An Image instance
      • An int representing the “level” for the exploding effect, that is the strength of the effect itself (higher the level, stronger the effect).
      • The last 2 int arguments represent the horizontal and vertical pieces of the exploded image.
    3. Start the explode effect with the explode() method, that will accept the effect duration as argument:
      image.explode(2000L);
    4. To paint it, simply use its paint() method, very similary to the Graphics drawImage() one. For example, in a Canvas paint() method, you can do something like this:
      protected void paint(Graphics g)
      {
      	g.setColor(0xffffff);
      	g.fillRect(0, 0, width, height);
      	image.paint(g, getWidth() / 2, getHeight() / 2, Graphics.HCENTER | Graphics.VCENTER);
      }

      To give the effect a “smooth” animation, you should paint it quite frequently (let’s say, not once per second :)). So, always using Canvas, a sample code could be like this:

      public void run()
      {
      	while(true)
      	{
      		repaint();
       
      		try
      		{
      			synchronized(this)
      			{
      				wait(50L);
      			}
      		}
      		catch(Exception e)
      		{
      			e.printStackTrace();
      		}
      	}
      }
    5. To test if the effect has ended, you can simply access your ExplodingImage ended instance variable:
      if(image.ended)
      {
      	//effect-end related code
      }
    6. And you’re done! See it in action here: J2ME image explode effect in action

    Sample source code is available here:

     
c
compose new post
j
next post/next comment
k
previous post/previous comment
r
reply
e
edit
o
show/hide comments
t
go to top
l
go to login
h
show/hide help
shift + esc
cancel