Updates from February, 2010 Toggle Comment Threads | Keyboard Shortcuts

  • pit 8:48 pm on February 5, 2010 Permalink | Reply
    Tags: bondi,   

    Last days to submit your widget to the BONDI competition 

    February 8th is the last day to submit your widget to the BONDI widget competition. The best widgets will be demonstrated during the Mobile World Congress in Barcelona.

    OMTP have launched a competition to design the best BONDI widget for demonstration at the GSMA Mobile World Congress. The competition is open from the 8th January until the 8th February inclusive.

    The aim of the competition is simple. Developers are requested to create the best example of a BONDI widget which can then be demonstrated on multiple BONDI supporting devices during the Mobile World Congress 2010 in Barcelona. The winners of the competition will be announced on the first day of the event.

    First prize is $5000, and there are a number of handset prizes that will be given out, including several Android and Windows Mobile based devices.

    Go Search
    Web Part Page Title Bar image
    competition2

    BONDI Widget Competition

    OMTP have launched a competition to design the best BONDI widget for demonstration at the GSMA Mobile World Congress. The competition is open from the 8th January until the 8th February inclusive.

    The aim of the competition is simple. Developers are requested to create the best example of a BONDI widget which can then be demonstrated on multiple BONDI supporting devices during the Mobile World Congress 2010 in Barcelona. The winners of the competition will be announced on the first day of the event.

     
  • pit 12:38 pm on February 5, 2010 Permalink | Reply
    Tags:   

    How to capture photos in a Web Runtime widget using APIBridge 

    One of the best features that APIBridge brings to Web Runtime widgets is, without doubts, the ability to capture photos, videos and audio.

    If you don’t know how to build a widget that includes APIBridge functionalities, you should read this article: Build your first Web Runtime widget with APIBridge.

    Now, let’s start with photos, and create a very basic widget with a button that will be used to take a snapshot.

    This is the HTML code used to create this simple widget:

    <body onload="init();">
     
    	<img id="capture_button" src="images/capture.png" />
     
    	<img id="captured_photo" />
     
    </body>

    The ‘captured_photo’ <img> tag will be used to show the captured photo, so it is just empty at the beginning.

    Before proceeding, it is necessary to include the APIBridge JavaScript library to the widget:

    <script language="javascript" type="text/javascript" src="js/apibridge.js"></script>

    Now, in the init() function, that is called when the widget loads, attach the ‘onclick’ event to the above button:

    document.getElementById('capture_button').addEventListener(
      'click',
      takePhoto,
      false
    );

    Now, the interesting part: the takePhoto() method has to call APIBridge, and start the photo capturing. This is done by using the newFileService method, that accepts 3 arguments:

    • the type of file (it can be: APIBridge.NewFileType.Image for photos, APIBridge.NewFileType.Video for video, and APIBridge.NewFileType.Audio for audio files)
    • the onSuccess event handler
    • the onError event handler

    So, the takePhoto() function calls the APIBridge.newFileService method as shown below:

    function takePhoto()
    {
      APIBridge.newFileService(
        APIBridge.NewFileType.Image,
        photoCaptureSuccess,
        photoCaptureError
      );
    }

    Now, what remains to do, is to define the onSuccess and onError event handlers.

    The photoCaptureSuccess() function receives as argument the full path of the new image or, if no image was taken, it just receive NULL.  The following function check if its argument is defined, and then sets the source of ‘captured_photo’ by using the image path.

    function photoCaptureSuccess(photoSource)
    {
      if (photoSource && photoSource.length)
      {
        document.getElementById('captured_photo').src = photoSource;
      }
      else
      {
        alert("No image taken...");
      }
    }

    The error handler receives as argument the Ajax request used to perform the call to APIBridge. In this case, it is enough to display an error message, informing the user that an error occurred:

    function photoCaptureError(ajaxReq)
    {
      alert("Error " + ajaxReq.status);
    }

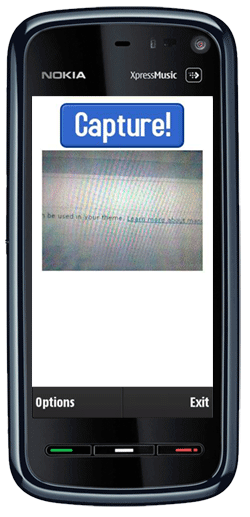
    Now, all is ready to test the widget. Let’s build and package it as described here, and here it is in action on a real device!

     
    • Jack 4:03 am on October 12, 2010 Permalink

      I have try this code, but i confuse for the “Now, in the init() function, that is called when the widget loads, attach the ‘onclick’ event to the above button:”….anyone can help me?

  • pit 5:37 pm on February 3, 2010 Permalink | Reply
    Tags: , , , hello world,   

    Build your first Web Runtime widget with APIBridge 

    This article shows you how to create, compile, build and deploy a Web Runtime widget, that includes the APIBridge plugin developed by Nokia, and available on Forum Nokia website.

    The APIBridge is a Symbian C++ engine that exposes native functionalities to Web Runtime widgets. These functionalities include:

    • Uploading files.
    • Capturing video, image, and audio.
    • Reading files.
    • Resizing images.

    Before starting with the following steps, you have to download APIBridge from Forum Nokia website, and unpack it to a convenient location on your machine.

    Also, to compile and build the whole example, you must get one UID from your SymbianSigned account.

    Step 1. Prepare your widget

    The first step is to develop your own widget, and to package it into the standard WGZ format. You can develop the widget with the tools of your choice.

    In this tutorial, I’ll just build a simple “Hello World” widget with the WRT Plugin for Aptana Studio. You can read a full guide about creating from scratch a simple widget on Forum Nokia Library.

    Using the Aptana Wizard interface, let’s create a new “Nokia Web Runtime Widget”.

    Now, let’s customize the “index.html” file with your Hello World text.
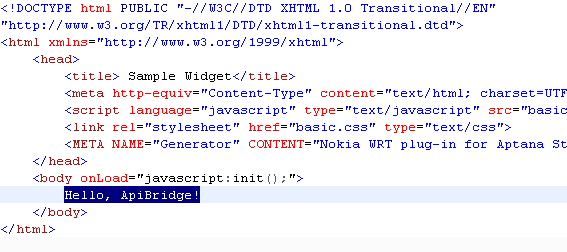
    So, the test widget is ready to be packaged!
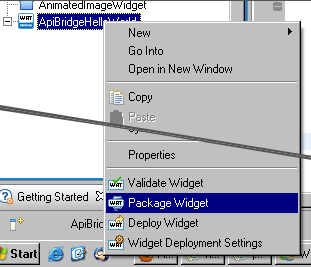
    Step 2. Compiling APIBridge source code

    Now, take the folder where you have unpacked APIBridge, and make a copy of its WgzInstaller folder. We’ll use this copy to create the new widget installer.

    Note: to perform this step, you must already have your own UID.

    Now, perform these changes:

    1. Open the group\WgzInstaller.mmp file, and replace the fake UID 0×12345678 with your own
    2. In the src\WgzInstaller.cpp file file, replace the KWidgetInstallerFileName with the actual filename of your packaged widget

    Now all is ready to compile your source code. Go into the group\ folder and, from command line, run:

    bldmake bldfiles
    abld build gcce

    If you don’t get any errors, the APIBridge code shoud have been correctly compiled.

    Step 3. Customize and package

    Now, copy your packaged widget to the content/ folder. Done this, open the /sis/WgzInstaller_template.pkg file and set the appropriate values for these properties:

    • Application name
    • Installation UID
    • Vendor name
    • .wgz file name

    Since we’re building from command line, we also have to tell where makesis can actually find the WgzInstaller.exe file created in the previous step. In this tutorial, I’ve used the S60 5th edition SDK v1.0, so I’ll change this value:

    “$(EPOCROOT)Epoc32\release\$(PLATFORM)\$(TARGET)\WgzInstaller.exe”

    to

    “\S60\devices\S60_5th_Edition_SDK_v1.0\Epoc32\release\gcce\urel\WgzInstaller.exe”

    Now, let’s create the SIS file: from command prompt, go into the sis/ folder and run:

    makesis WgzInstaller_template.pkg

    Your output should be something like this:

    Processing WgzInstaller_template.pkg...
    Created  WgzInstaller_template.sis.

    Step 4. Sign and deploy

    Take the SIS file you’ve created in the previous step, and sign it with your own SymbianSigned certificate:

    signsis WgzInstaller_template.sis WgzInstaller_template_signed.sis your_certificate.cer your_key.key your_password

    Now, your widget is ready! Just send it to your Nokia device, and install. You’ll notice that, during the installation, you’ll be prompted to install both your widget and the APIBridge engine.
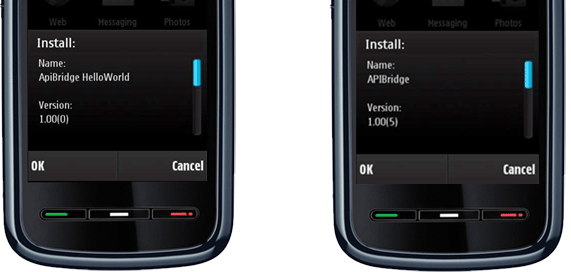
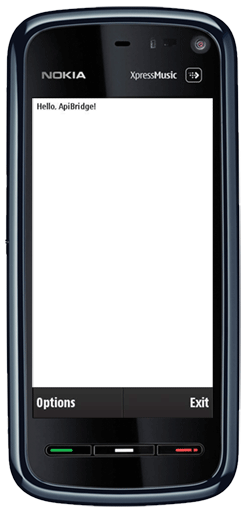
    Below you can see the Hello World widget running in all its glory :)

    Thanks go to Leonardo for his precious support! :)

     
  • pit 8:31 am on February 1, 2010 Permalink | Reply
    Tags: , , ,   

    Using Google Static Maps in your widget with JavaScript 

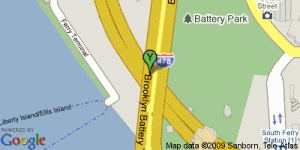
    A new featured article from Ar.tur on Forum Nokia Wiki shows you how to use the static version of Google Maps in your mobile widget by using few lines of JavaScript code.

    The same article also shows how to use the Location API from Web Runtime Platform Services to retrieve your current location, and then using this data to get the appropriate map from Google Maps.

    You can read the full article here: Static GoogleMaps API in JavaScript.

     
  • pit 1:35 pm on December 18, 2009 Permalink | Reply
    Tags: , , ,   

    Mobile Web Templates Wiki Contest Winners Announced 

    The Forum Nokia Wiki Mobile Web Templates contest winners were announced!

    The Winners of the Mobile Web Template Contests are:

    The Wiki administrators and I give a big hand to these contributors to the Forum Nokia members

    For those of you interested in creating mobile web sites or Web Runtime widgets, you should definitely check out the Mobile Web Templates section of Forum Nokia Wiki. Here’s the list of my contributions:

    Hope they’ll be useful to you! :)

     
    • Alessandro 1:49 pm on December 23, 2009 Permalink

      Ciao Alessandro,

      congrats, great job!
      Alessandro

    • Leonardo 12:03 pm on January 29, 2010 Permalink

      Ciao Pit!

      congrats. Well done!

      -Leo

    • NBPATEL 5:56 am on March 4, 2010 Permalink

      Congrats from NBPATEL

  • pit 4:11 pm on November 20, 2009 Permalink | Reply
    Tags: , , , , , , ,   

    How to create a new Component for the Guarana UI Library 

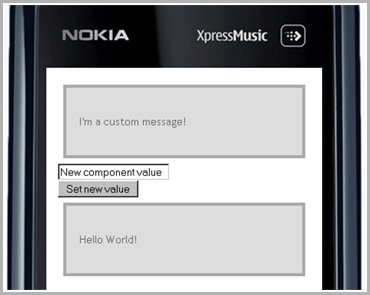
    This new article shows how to create from scratch a new Component from the Guarana UI Library.

    The article shows all the steps involved in the creation of the new Component, explaining all the necessary details to understand the whole process, passing by the setup of the Component file structure, the writing of the actual Component JS and CSS code, and the integration of the Component with the Guarana UI building process.

    Purpose of the article is to give developers guidelines to create their own Components, integrating them with the Guarana UI Library. The component is also available on the Guarana UI online Components Browser.

    The full article is available, as usual, on Forum Nokia Wiki: How to create a new Component for the Guarana UI Library Guarana.

     
    • Allan Bezerra 6:36 pm on November 20, 2009 Permalink

      Jappit,
      Really cool!
      I only did a little modification on Guarana PATH setting place.
      Tks,
      – Allan Bezerra

    • koko 3:01 am on November 30, 2009 Permalink

      Wow thanks these are great and very appreciated

c
compose new post
j
next post/next comment
k
previous post/previous comment
r
reply
e
edit
o
show/hide comments
t
go to top
l
go to login
h
show/hide help
shift + esc
cancel