How to capture photos in a Web Runtime widget using APIBridge
One of the best features that APIBridge brings to Web Runtime widgets is, without doubts, the ability to capture photos, videos and audio.
If you don’t know how to build a widget that includes APIBridge functionalities, you should read this article: Build your first Web Runtime widget with APIBridge.
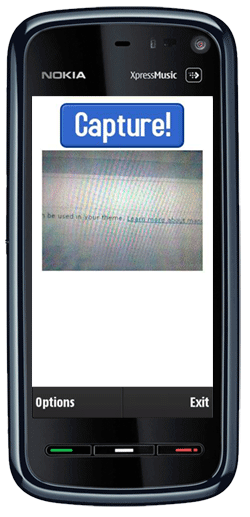
Now, let’s start with photos, and create a very basic widget with a button that will be used to take a snapshot.
This is the HTML code used to create this simple widget:
<body onload="init();"> <img id="capture_button" src="images/capture.png" /> <img id="captured_photo" /> </body> |
The ‘captured_photo’ <img> tag will be used to show the captured photo, so it is just empty at the beginning.
Before proceeding, it is necessary to include the APIBridge JavaScript library to the widget:
<script language="javascript" type="text/javascript" src="js/apibridge.js"></script> |
Now, in the init() function, that is called when the widget loads, attach the ‘onclick’ event to the above button:
document.getElementById('capture_button').addEventListener( 'click', takePhoto, false ); |
Now, the interesting part: the takePhoto() method has to call APIBridge, and start the photo capturing. This is done by using the newFileService method, that accepts 3 arguments:
- the type of file (it can be: APIBridge.NewFileType.Image for photos, APIBridge.NewFileType.Video for video, and APIBridge.NewFileType.Audio for audio files)
- the onSuccess event handler
- the onError event handler
So, the takePhoto() function calls the APIBridge.newFileService method as shown below:
function takePhoto() { APIBridge.newFileService( APIBridge.NewFileType.Image, photoCaptureSuccess, photoCaptureError ); } |
Now, what remains to do, is to define the onSuccess and onError event handlers.
The photoCaptureSuccess() function receives as argument the full path of the new image or, if no image was taken, it just receive NULL. The following function check if its argument is defined, and then sets the source of ‘captured_photo’ by using the image path.
function photoCaptureSuccess(photoSource) { if (photoSource && photoSource.length) { document.getElementById('captured_photo').src = photoSource; } else { alert("No image taken..."); } } |
The error handler receives as argument the Ajax request used to perform the call to APIBridge. In this case, it is enough to display an error message, informing the user that an error occurred:
function photoCaptureError(ajaxReq) { alert("Error " + ajaxReq.status); } |
Now, all is ready to test the widget. Let’s build and package it as described here, and here it is in action on a real device!


Jack 4:03 am on October 12, 2010 Permalink
I have try this code, but i confuse for the “Now, in the init() function, that is called when the widget loads, attach the ‘onclick’ event to the above button:”….anyone can help me?