Tagged: flashlite Toggle Comment Threads | Keyboard Shortcuts

  • pit 6:26 pm on March 23, 2010 Permalink | Reply
    Tags: admob, , flashlite,   

    AdMob launches Flash Lite SDK! 

    Good news for all Flash Lite developers: AdMob officially launched its Flash Lite SDK!

    The funny thing is that Flash Lite is mentioned as an “emerging” platform, even if it’s not that young :)

    From the official announcement:

    In 2009, we reported an installed base of 80+ million devices with Flash Lite support in Japan. To download the Flash Lite SDK, log into your account, select the “Sites & Apps” tab, and click on the “Add Site/App” link. On this page, you can register your Flash Lite app and then download the SDK.

    This will finally allow all Flash Lite developers to easily integrate AdMob advertising into their applications and games, without the need to implement this functionality from scratch.

    After the announcement of in app purchasing for Flash Lite from Kuneri, this is a big step towards the monetization of Flash Lite content, and will hopefully help the Flash Lite developers’ community to grow further.

    Maybe we won’t become all billionaires, but who knows? :)

     
  • pit 11:04 pm on February 8, 2010 Permalink | Reply
    Tags: , , , flashlite, ,   

    How to use FDT and Aptana to create a Flash Lite enabled WRT widget 

    We’ve seen, in this previous post, how to setup Eclipse in order to develop both Web Runtime widgets and Flash Lite applications, thanks to Aptana, the Nokia Web Runtime plugin and FDT. This article will focus on how to create a Web Runtime widget that includes some Flash Lite content.

    First of all, be sure to have installed all the required Eclipse plugins, as described here.

    Create a new Web Runtime widget

    To create a Web Runtime widget, just open up the “New Project” wizard and select the “New Nokia Web Runtime Widget”.

    The wizard will now let you choose from some predefined widget templates. In this article, it is enough to start with an empty widget.

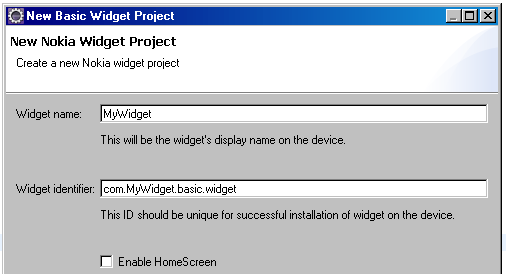
    And finally enter the name and identifier of your new widget. The identifier has to be a string in the reverse domain format, and will uniquely identify your own widget.

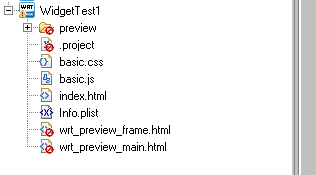
    Once created, the widget’s structure should be the one shown below.

    Create the Flash Lite content

    First, create a new Flash Lite project by using the “New Flash Project” template. Then, create the project’s main class. One example is the MainMovie class shown below:

    class com.jappit.flashlitetest1.MainMovie
    {
    	public function MainMovie()
    	{
    	}
     
    	public static function main(container : MovieClip) : Void
    	{
    		Stage.align = "TL";
    		Stage.scaleMode = "noScale";
    		container.createTextField("tf", 1, 0, 0, 100, 100);
    		var tf : TextField = container["tf"];
    		tf.text = "I'm the Flash Lite content!";
    	}
    }

    Changing the MTASC launch configuration

    Now, the MTASC command has to be changed a bit, so that the generated SWF will automatically end up in the Web Runtime widget project’s folder.

    To do this, open up the MTASC launch configuration, and change the generated SWF path to be a subpath of your widget’s main folder. You can see an example of the command in the picture below.

    Now, run the project launch configuration, and check the widget’s folder: the SWF generated by MTASC should be there, together with the other widget’s files.

    Including the SWF content in your widget

    Forum Nokia Wiki has a comprehensive article explaining the possible ways of integrating Flash content into a Web Runtime widget. In this article the first described approach, the same used on the Web, is implemented.

    So, take the widget’s index.html file, and add this HTML code:

    <object id="MyFlash" classid="clsid:d27cdb6e-ae6d-11cf-96b8-444553540000" width="200" height="200" codebase="http://download.macromedia.com/pub/shockwave/cabs/flash/swflash.cab#version=6,0,40,0">
    	<param name="align" value="middle" />
    	<param name="allowScriptAccess" value="sameDomain" />
    	<param name="loop" value="false" />
    	<param name="menu" value="false" />
    	<param name="quality" value="high" />
    	<param name="wmode" value="opaque" />
    	<param name="bgcolor" value="#ffffff" />
    	<param name="src" value="default_mtasc.swf" />
    	<param name="name" value="Finish" />
    	<embed id="MyFlash" type="application/x-shockwave-flash" width="200" height="200" src="default_mtasc.swf" name="Finish" bgcolor="#ffffff" wmode="opaque" quality="high" menu="false" loop="false" allowscriptaccess="sameDomain" align="middle"></embed>
    </object>

    Packaging and deploying

    If all went well, all is ready to be packaged and deployed.

    Right click the project, choose “Package widget”, deploy and enjoy! :)

    You can download the widget built in this article here: Flash Lite enabled WRT sample widget.

     
    • Wez 11:42 pm on February 8, 2010 Permalink

      Thanks for the write up man.

    • Bill Perry 10:05 am on February 9, 2010 Permalink

      nice article, thanks for posting.

    • pit 10:20 am on February 9, 2010 Permalink

      Thank you! Glad to know you liked the article :)

  • pit 4:51 pm on February 8, 2010 Permalink | Reply
    Tags: , , , flashlite, , mtasc, ,   

    Web Runtime and Flash Lite integrated development on Eclipse 

    Nokia devices offer a wide range of technologies and languages that can be used to create mobile applications. Two of these are strictly related each other, and can be used together to create applications that benefit of both sides: Flash Lite and Web Runtime.

    For this reason, in this article I’ll try to explain how to setup a single environment that may allow development on both technologies, so leveraging the development phase from continuous swaps between different IDEs, and by boosting it all thanks to the powerful Eclipse platform.

    Installing Eclipse and plugins

    First of all, download Eclipse. I currently use version 3.5 on my own machine, but other versions should work as well.

    Once downloaded, proceed installing the following plugins:

    1. Aptana plugin for Eclipse: http://www.aptana.org/studio/plugin
    2. Web Runtime plugin for Aptana: http://tools.ext.nokia.com/wrt/prod/aptana/plugin/
    3. FDT plugin for Eclipse: http://www.fdt.powerflasher.com/developer-tools/fdt-3/download/

    After you’ve installed the above plugins, you’ll notice two new project types in your Eclipse project wizard: Flash and Nokia Web Runtime projects.
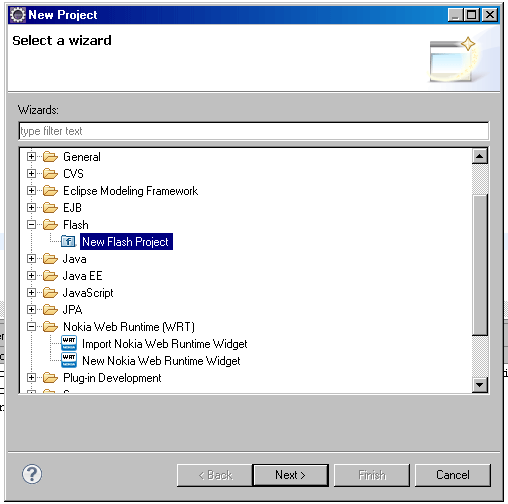
    Basically, these 3 plugins are all you need to start developing both Web Runtime and Flash Lite applications. Anyway, FDT needs some further configuration steps to properly work with Flash Lite apps.

    Configure the FDT plugin

    FDT needs to know how to compile your Flash Lite projects. You basically have two choices: use the Adobe Flash IDE, or use MTASC.

    • The first choice is available if you have already installed a copy of a Flash IDE, and can be configured by going into the “Window” -> “Preferences” -> “FDT” -> “Tools” -> “Flash” settings panel. Once there, just enter the paths of your Flash IDE and Player.

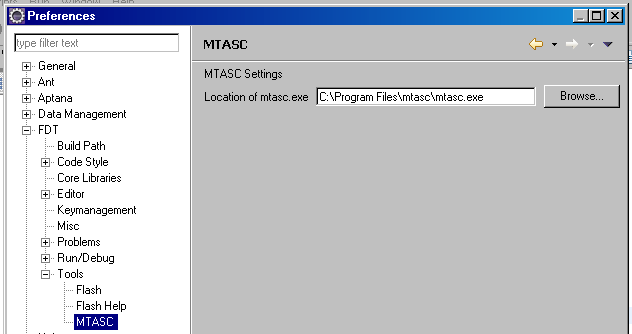
    • The second one, quicker and free, needs MTASC to be installed on your machine (you can get it here), and configured in the “Window” -> “Preferences” -> “FDT” -> “Tools” -> “MTASC” panel. I actually prefer this option, as it allows you to develop Flash Lite applications also on machines where the Flash IDE is not available.
    Add Flash Lite-specific classes and functions

    FDT uses the standard ActionScript 2 classes to allow you to compile your Flash Lite project. Anyway, these lack some Flash Lite-specific classes and functions, as ExtendedKey and SharedObject.addListener() method, that have to be manually added, as also explained here.

    To do this, go into the “<ECLIPSE_ROOT_FOLDER>\configuration\com.powerflasher.fdt.core\.config\core\as2\” folder and:

    1. Create a file called “ExtendedKey.as” with this content:
      intrinsic class ExtendedKey
      {
      static var SOFT1:String = "soft1";
      static var SOFT2:String = "soft2";
      static var SOFT3:String = "soft3";
      static var SOFT4:String = "soft4";
      static var SOFT5:String = "soft5";
      static var SOFT6:String = "soft6";
      static var SOFT7:String = "soft7";
      static var SOFT8:String = "soft8";
      static var SOFT9:String = "soft9";
      static var SOFT10:String = "soft10";
      static var SOFT11:String = "soft11";
      static var SOFT12:String = "soft12";
      }
    2. Open “SharedObject.as” and add these lines to the class definition:
      var scope : Object;
      static function GetMaxSize() : Number;
      static function addListener(objectName:String, notifyFunction:Function) : Void;
      static function removeListener(objectName:String) : Void;
    3. Now, switch to the “<ECLIPSE_ROOT_FOLDER>\configuration\com.powerflasher.fdt.core\.config\topLevel\” folder, open TopLevel.as, and add this function definition:
      function fscommand2(command:String, parameters:Object):Void;

      If you plan to use MTASC to compile your Flash Lite applications, the above changes have to be performed also to the ActionScript files used by MTASC itself. These files are typically placed in the “<MTASC_ROOT_FOLDER>\std” folder: go there and repeat the 3 steps above for ExtendedKey.as, SharedObject.as and TopLevel.as.

      That’s all! Now let’s give FDT a quick test to check if all is correctly configured.

      Testing the FDT configuration

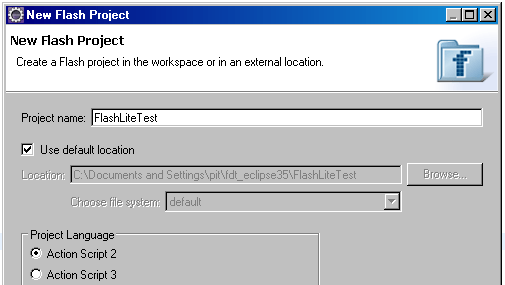
      Creating a new Flash Lite project is straightforward: just select “New Flash project” from the Eclipse project wizard, and then choose a name for your project. In the Project Language section, be sure to select “ActionScript 2″.
      Once the project has been created, switch to the “Flash FDT” perspective by selecting “Window” -> “Open perspective” -> “Flash FDT”.

      Now, create the project’s main class. The only required method to be implemented is the static main(), that has to perform all the initialization operations:

      class com.jappit.flashlitetest1.MainMovie
      {
        public function MainMovie()
        {
        }
       
        public static function main(container : MovieClip) : Void
        {
          Stage.align = "TL";
          Stage.scaleMode = "noScale";
          container.createTextField("tf", 1, 0, 0, 100, 100);
          var tf : TextField = container["tf"];
          tf.text = "Hello World";
        }
      }

      Now, if the FDT configuration was properly done, you shouldn’t get any errors. So, if all is ok, open the “Run Configurations…” panel from the “Run” menu.

      Under “FDT MTASC” create a new launch configuration. In the “Main” sub-panel select the main class created just above.

      Then, go to the “Miscellaneous” sub-panel and check the “Start SWF after compilation” option. This way, the SWF will be immediately launched, after each build, in the Eclipse’s internal SWF viewer.

      Now, all is ready to be tested: just run the created launch configuration, and enjoy your new Flash Lite app :)

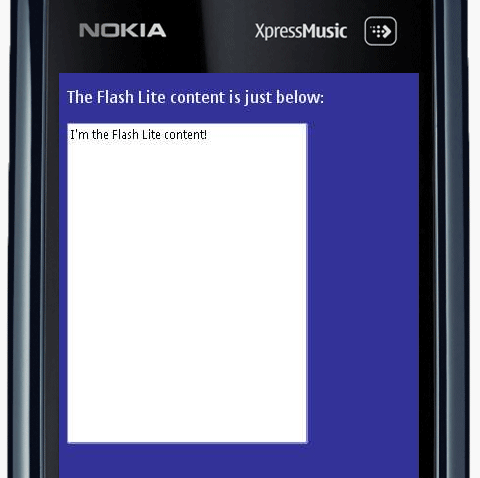
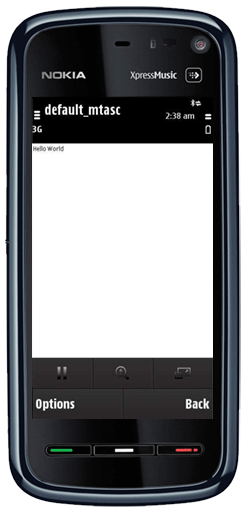
      And here’s the generated SWF running on a real device:
      What’s next?

      Next tutorials will focus on using both Web Runtime and FDT plugins to develop Flash Lite-enabled widgets. So, stay tuned!

       
    • pit 11:00 am on May 28, 2009 Permalink | Reply
      Tags: flashlite, , ovi flash,   

      Ovi Flash: promote your Flash Lite apps on Ovi Store! 

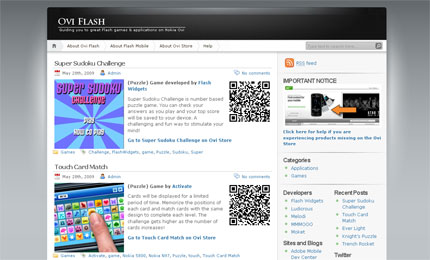
      Ovi Flash is a brand new site that helps Flash Lite developers around the globe to promote their content on the Ovi Store.

      Here on Ovi Flash, we direct you to great Flash content that can be found on Nokia’s Ovi Store. Ovi is a perfect distribution channel for Flash developers creating games and applications for Nokia devices, and we want to make it easier for you to find this content – and support developers by encouraging you to download/purchase the content once you’re there!

      Ovi Flash also helps solving some first issues encountered by users on the Ovi Store website itself (as the missing product one).

      This is a great opportunity to boost your applications visibility on the Ovi Store, so, if you want to promote your content, just email all the details to info@oviflash.com.

       
    c
    compose new post
    j
    next post/next comment
    k
    previous post/previous comment
    r
    reply
    e
    edit
    o
    show/hide comments
    t
    go to top
    l
    go to login
    h
    show/hide help
    shift + esc
    cancel