Build your first Web Runtime widget with APIBridge
This article shows you how to create, compile, build and deploy a Web Runtime widget, that includes the APIBridge plugin developed by Nokia, and available on Forum Nokia website.
The APIBridge is a Symbian C++ engine that exposes native functionalities to Web Runtime widgets. These functionalities include:
- Uploading files.
- Capturing video, image, and audio.
- Reading files.
- Resizing images.
Before starting with the following steps, you have to download APIBridge from Forum Nokia website, and unpack it to a convenient location on your machine.
Also, to compile and build the whole example, you must get one UID from your SymbianSigned account.
Step 1. Prepare your widget
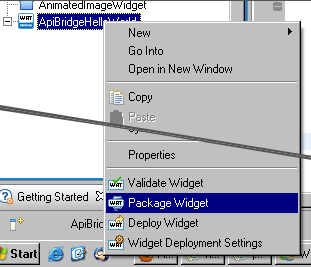
The first step is to develop your own widget, and to package it into the standard WGZ format. You can develop the widget with the tools of your choice.
In this tutorial, I’ll just build a simple “Hello World” widget with the WRT Plugin for Aptana Studio. You can read a full guide about creating from scratch a simple widget on Forum Nokia Library.
Using the Aptana Wizard interface, let’s create a new “Nokia Web Runtime Widget”.
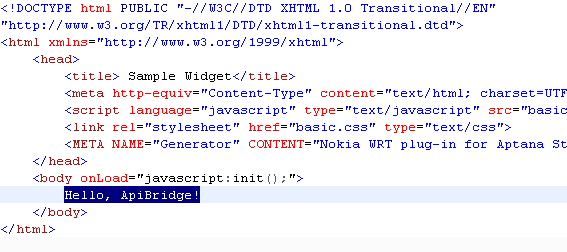
Now, let’s customize the “index.html” file with your Hello World text.
So, the test widget is ready to be packaged!
Step 2. Compiling APIBridge source code
Now, take the folder where you have unpacked APIBridge, and make a copy of its WgzInstaller folder. We’ll use this copy to create the new widget installer.
Note: to perform this step, you must already have your own UID.
Now, perform these changes:
- Open the group\WgzInstaller.mmp file, and replace the fake UID 0×12345678 with your own
- In the src\WgzInstaller.cpp file file, replace the KWidgetInstallerFileName with the actual filename of your packaged widget
Now all is ready to compile your source code. Go into the group\ folder and, from command line, run:
bldmake bldfiles
abld build gcce
If you don’t get any errors, the APIBridge code shoud have been correctly compiled.
Step 3. Customize and package
Now, copy your packaged widget to the content/ folder. Done this, open the /sis/WgzInstaller_template.pkg file and set the appropriate values for these properties:
- Application name
- Installation UID
- Vendor name
- .wgz file name
Since we’re building from command line, we also have to tell where makesis can actually find the WgzInstaller.exe file created in the previous step. In this tutorial, I’ve used the S60 5th edition SDK v1.0, so I’ll change this value:
“$(EPOCROOT)Epoc32\release\$(PLATFORM)\$(TARGET)\WgzInstaller.exe”
to
“\S60\devices\S60_5th_Edition_SDK_v1.0\Epoc32\release\gcce\urel\WgzInstaller.exe”
Now, let’s create the SIS file: from command prompt, go into the sis/ folder and run:
makesis WgzInstaller_template.pkg
Your output should be something like this:
Processing WgzInstaller_template.pkg...
Created  WgzInstaller_template.sis.
Step 4. Sign and deploy
Take the SIS file you’ve created in the previous step, and sign it with your own SymbianSigned certificate:
signsis WgzInstaller_template.sis WgzInstaller_template_signed.sis your_certificate.cer your_key.key your_password
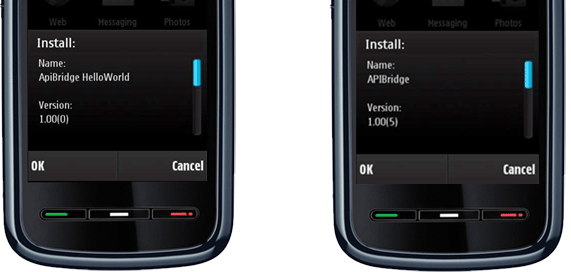
Now, your widget is ready! Just send it to your Nokia device, and install. You’ll notice that, during the installation, you’ll be prompted to install both your widget and the APIBridge engine.
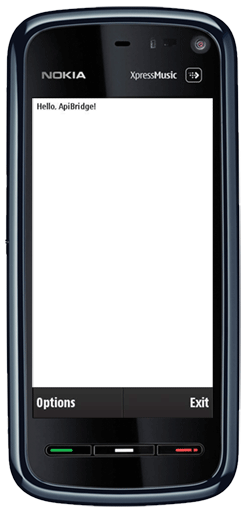
Below you can see the Hello World widget running in all its glory ![]()
Thanks go to Leonardo for his precious support! ![]()







How to capture photos in a Web Runtime widget using APIBridge « Jappit.com 12:42 pm on February 5, 2010 Permalink
[...] If you don’t know how to build a widget that includes APIBridge functionalities, you should read this article: Build your first Web Runtime widget with APIBridge. [...]
Make A Web Runtime Widget with APIBridge | The S60 Blog 7:07 pm on February 6, 2010 Permalink
[...] Jappit has published a great tutorial about creating a sample widget with APIBridge. The guide shows you how to create, compile, build and deploy a Web Runtime widget, that includes the APIBridge plugin developed by Nokia, and available on Forum Nokia website. It tries to explain all the involved steps: from developing the widget, to building and deploying. So go ahead and give your feedback about it, and especially suggestions on how and where it can be improved [...]
How to speed up deploying and testing of your API Bridge-based applications « Jappit.com 5:53 pm on February 12, 2010 Permalink
[...] working with API Bridge applications, you need to package them with the API Bridge engine within a Symbian SIS package each time you want to deploy it on a device. This could actually be a [...]