Touch and J2ME part 1: how scroll an image
When you start writing your first app for the new S60 5th edition platform you’ll find that, among the first things to deal with, there is interface scrolling: when playing with touchscreen devices, users expect to be able to interact with on-screen objects by simple stylus/finger gestures, rather than by an old-fashion, on-screen keyboard.
Today, we’ll see how to implement touch scrolling in Java ME in a simple scenario: scrolling a large Image, that doesn’t fit on the device display.

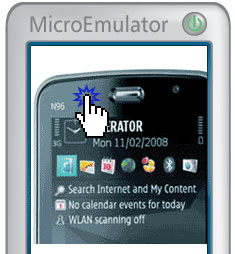
A sample MIDlet showing this code in action is available on the emulator page: Touch scrollable image in action.
Source Code: ScrollableImageCanvas class
Let’s start defining the main class, that will extend the Canvas object:
public class ScrollableImageCanvas extends Canvas { { |
Now, we define properties that we’ll use to manage:
- image size
- image translation
- user touch interaction
// image-related properties int imageHeight = 0; int imageWidth = 0; Image image = null; // scroll properties protected int translationX = 0; protected int translationY = 0; // touch properties protected int lastPointerX = -1; protected int lastPointerY = -1; |
Class constructor is quite straightforward, and only needs an Image as argument:
public ScrollableImageCanvas(Image image) { this.image = image; this.imageWidth = image.getWidth(); this.imageHeight = image.getHeight(); } |
Also paint() implementation is simple, since it simply draws the given Image at current translation x and y coordinates:
protected void paint(Graphics g) { g.setColor(0xffffff); g.fillRect(0, 0, getWidth(), getHeight()); g.drawImage(image, - translationX, - translationY, Graphics.TOP | Graphics.LEFT); } |
Finally, we must implement the touch-based scrolling functionality. To do this, we’ll override the 3 pointer handlers provided by Canvas objects:
- pointerPressed: called when the pointer is pressed
- pointerReleased: called when the pointer is released
- pointerDragged: called when the pointer is dragged
protected void pointerPressed(int x, int y) { lastPointerX = x; lastPointerY = y; } protected void pointerReleased(int x, int y) { lastPointerX = -1; lastPointerY = -1; } protected void pointerDragged(int x, int y) { scrollImage(lastPointerX - x, lastPointerY - y); lastPointerX = x; lastPointerY = y; } |
The scrollImage() method implementation follows. What it does is:
- increment the current translation x and y coordinated by the given x and y deltas
- normalize the new translation x and y coordinates, so that Image will not go out of bounds
void scrollImage(int deltaX, int deltaY) { if(imageWidth > getWidth()) { translationX += deltaX; if(translationX < 0) translationX = 0; else if(translationX + getWidth() > imageWidth) translationX = imageWidth - getWidth(); } if(imageHeight > getHeight()) { translationY += deltaY; if(translationY < 0) translationY = 0; else if(translationY + getHeight() > imageHeight) translationY = imageHeight - getHeight(); } repaint(); } |
Complete class source code is available here: ScrollableImageCanvas.java.
If you like this article, feel free to rate it on Forum Nokia Wiki.
Further development
A lot of improvements can be done to the code presented in this article. Just some examples are:
- scrollbars: a fundamental element to let the user know how much he can scroll both in vertical and horizontal directions
- smooth scrolling: using some inertia when applying scrolling movement will make the whole scrolling effect a lot more realistic


truf 11:44 am on October 7, 2008 Permalink
Looking forward for part 2.
Bhaskar Nag 8:51 am on November 5, 2008 Permalink
Your site is very strong in contents of j2me.I got my required codes in j2me from your site.please send me lots of j2me (mobile application code) in my mentioned emailid bellow,I would be highly obliged.
bhaskar.nag@rediffmail.com
Thanking You.
Your’s truely.
Bhaskar Nag.
kamil inal 1:54 pm on November 6, 2009 Permalink
Thanks for this article:)
ankush 9:00 am on April 16, 2011 Permalink
thanx a lot ..
abah 1:40 pm on September 16, 2011 Permalink
thanks! it helps me!